
Forms: Textual Input Types
Forms are one of the main places of interaction for users of web pages and are a familiar part of our experience on the web. We use forms to collect different kinds of information through interacive user inputs.
These interactive inputs include email and password fields, checkboxes, buttons that we can click, and dropdown menus that allow us to choose from a series of options. Users generally complete a form by entering text, selecting items, etc. and submitting the form to a web server for further processing.
There are so many different things that we can do with forms. They are an essential part of any website, and of the most important web concepts to learn.
FORM INPUT TYPES
We will start with what forms are, what they do, and where we can find them out on the web. You should know them well already, and you will recognise them when you see them.
We will also briefly talk about how forms work, then we will learn about the various form fields brought to us by the HTML input element, which gives us various and differing input types.
Some of these input types that you would be familiar with include email input types and passwordinput types. These are what we would call text-based or textual inputs. These are fields on a web page into which we would enter written text of some kind.
Later, we will look at clickable input types like the checkbox, and the submit button.
Here are the different input types you can use in HTML. We'll look at many of these over the next two sections:
<input type="button"><input type="checkbox"><input type="color"><input type="date"><input type="datetime-local"><input type="email"><input type="file"><input type="hidden"><input type="image"><input type="month"><input type="number"><input type="password"><input type="radio"><input type="range"><input type="reset"><input type="search"><input type="submit"><input type="tel"><input type="text"><input type="time"><input type="url"><input type="week">THE HTML FORM ELEMENT
Before we learn about form input types, we need to know about the HTML <form> element. This element defines a form that is used to collect user input.
So, in short, we use the form element to wrap elements that belong to the form.
These would include different types of input elements, like text fields, checkboxes, radio buttons, submit buttons, and more.
A typical form might look something like this Netflix login:

FORMS OUT IN THE WILD
That is useful to know and helps us build a picture in our minds, but where might we see some forms out in the wild? Some web site or web application where we can enter data into a field and click a button of some sort to send that data somewhere and wait for some response Maybe we log in to something or just get some data given back to us which is the result of our query.
One example that springs immediately to mind is Google Search, which is a simple form. We can see that by inspecting it with DevTools.
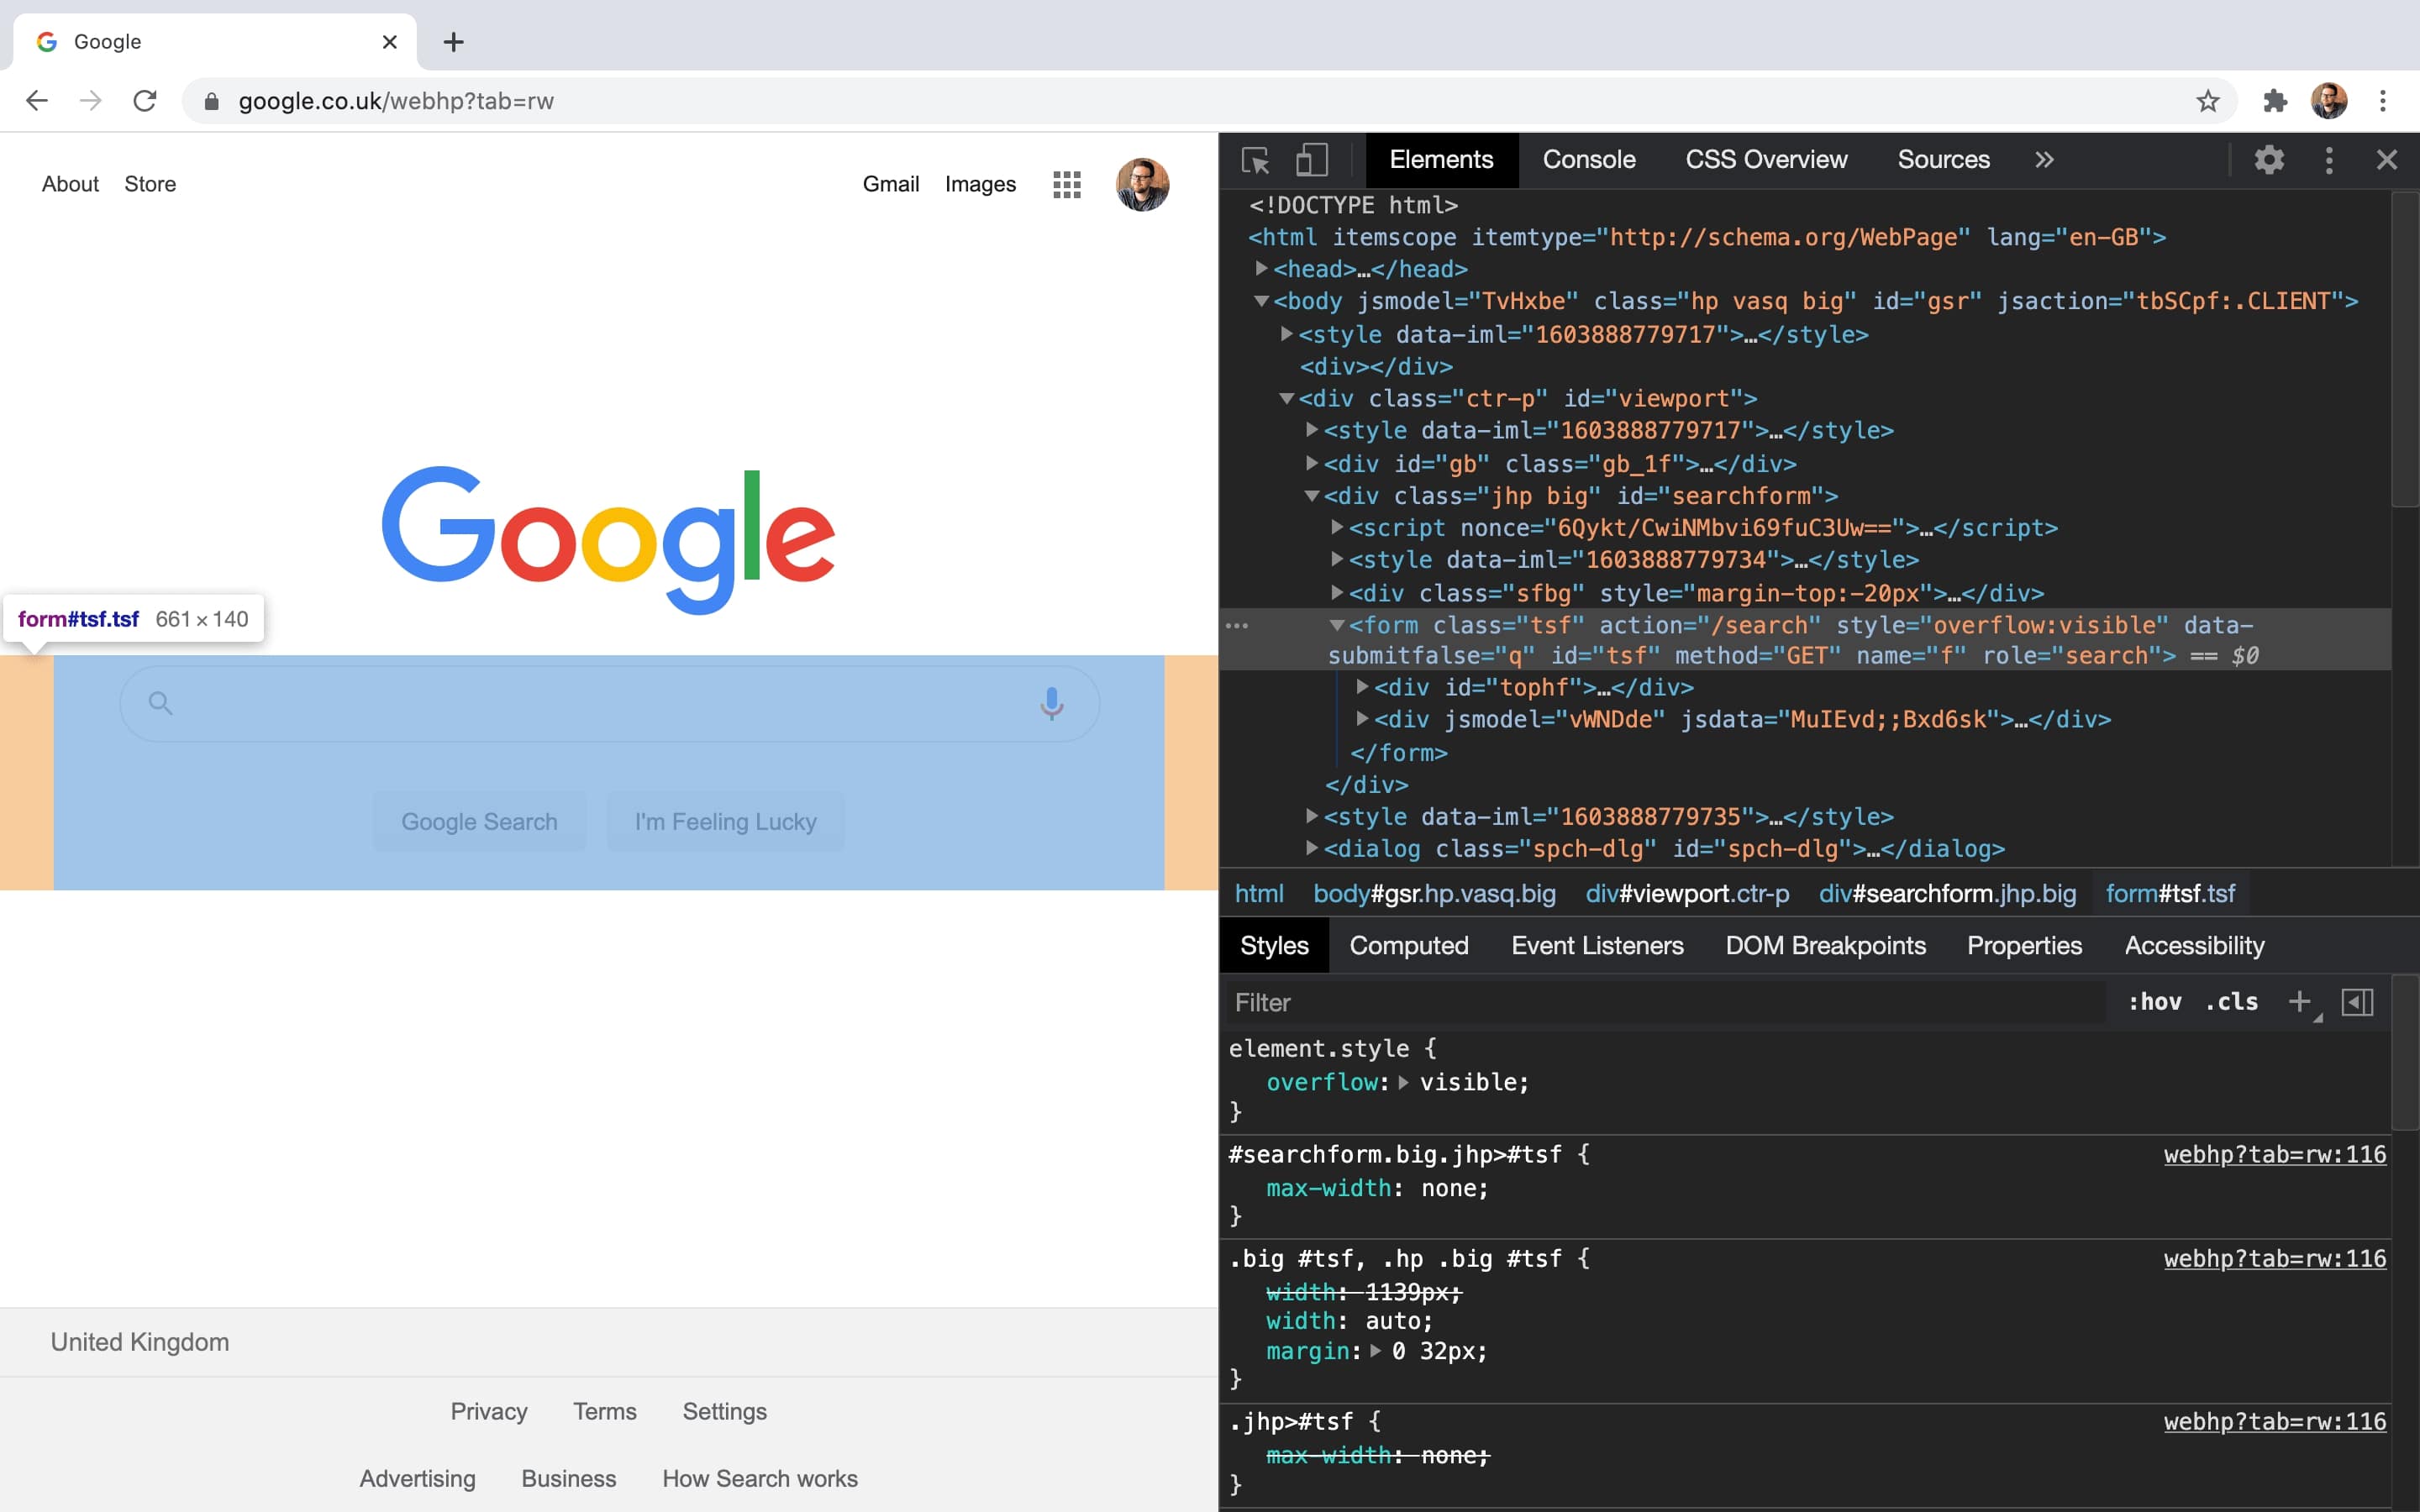
This form sends a query to Google, and they send us back some matching data that hopefully helps us. So we GET or request information. We are using the form to GET something back.
Facebook & Twitter
We also use a form to log in to Facebook or Twitter or anything else. When we log in, rather than getting or requesting something, we are sending something.
Namely, our login credentials to be authenticated. If we send the right information, then we are granted access. So in that case we POST data.
So when we use forms, we can do two things essentially. We can GET, or we can POST.
You would also use a form to edit your settings inside Twitter and Facebook. To Tweet or Post to your wall, or to comment on someone else's post. You use forms to opt-in and opt-out of promotions or mailing lists, or when entering your payment details to Amazon or eBay.
YouTube
There's even a decent chance that you used a form to find one of our videos on YouTube if you used the search bar. A lot of the traffic to Assembly comes from organic searches from within YouTube.
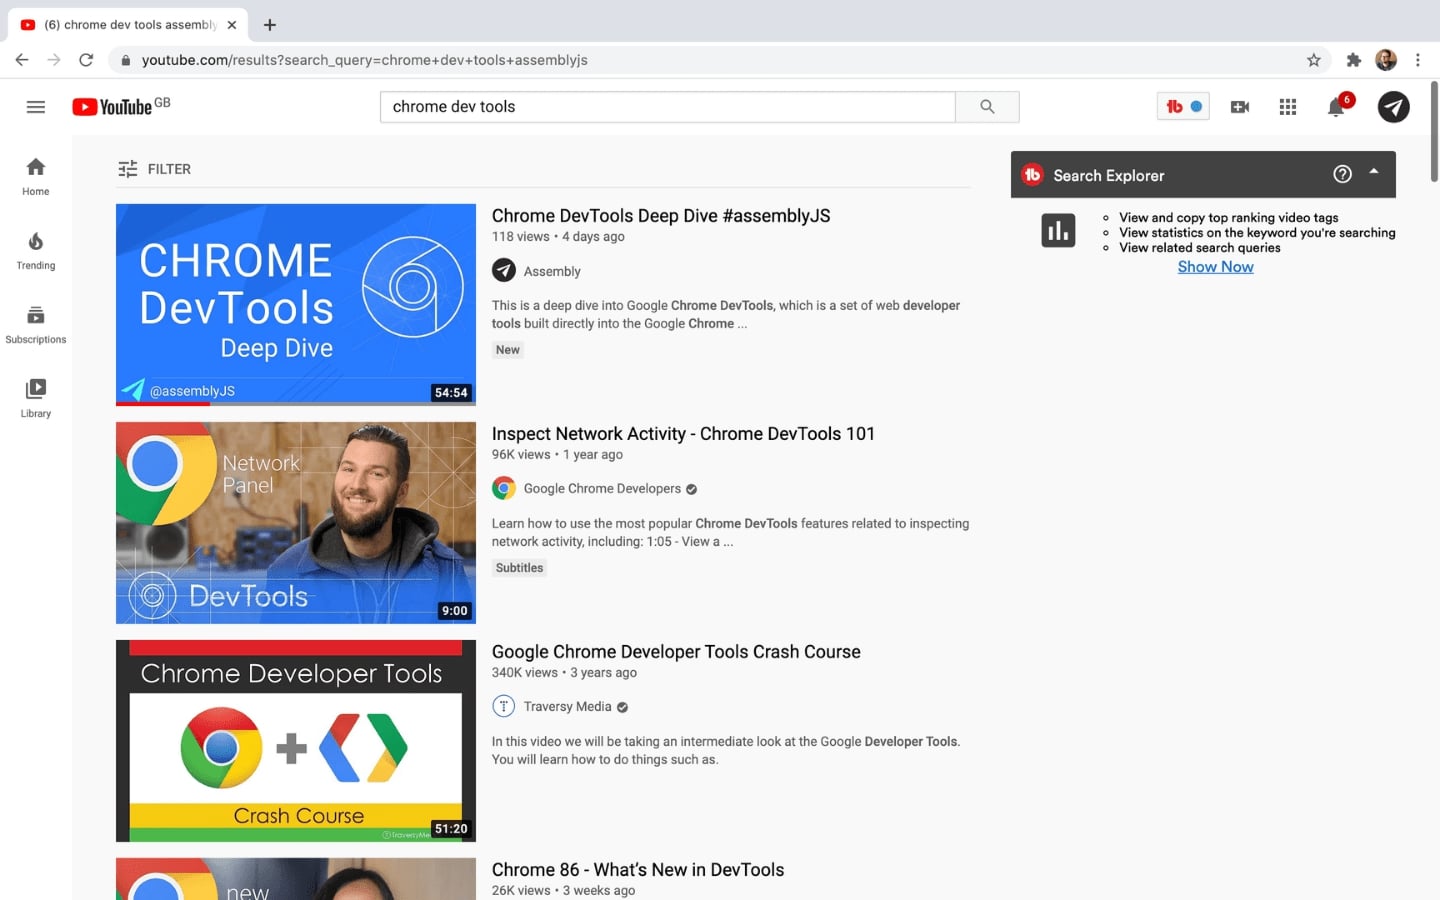
Somebody might search something like "How to build an HTML form", and YouTube will send back what it thinks are the best options to satisfy that user's request. One of which may have been this video.
So as you can see, the list of the varying uses of forms goes on and on.
EXAMINING FACEBOOK'S LOGIN FORM
If you right-click anywhere on the login form and select inspect from the DevTools menu, we see that there are form tags - opening and closing, and inside we have a couple of textual input types and an input with the type of submit.
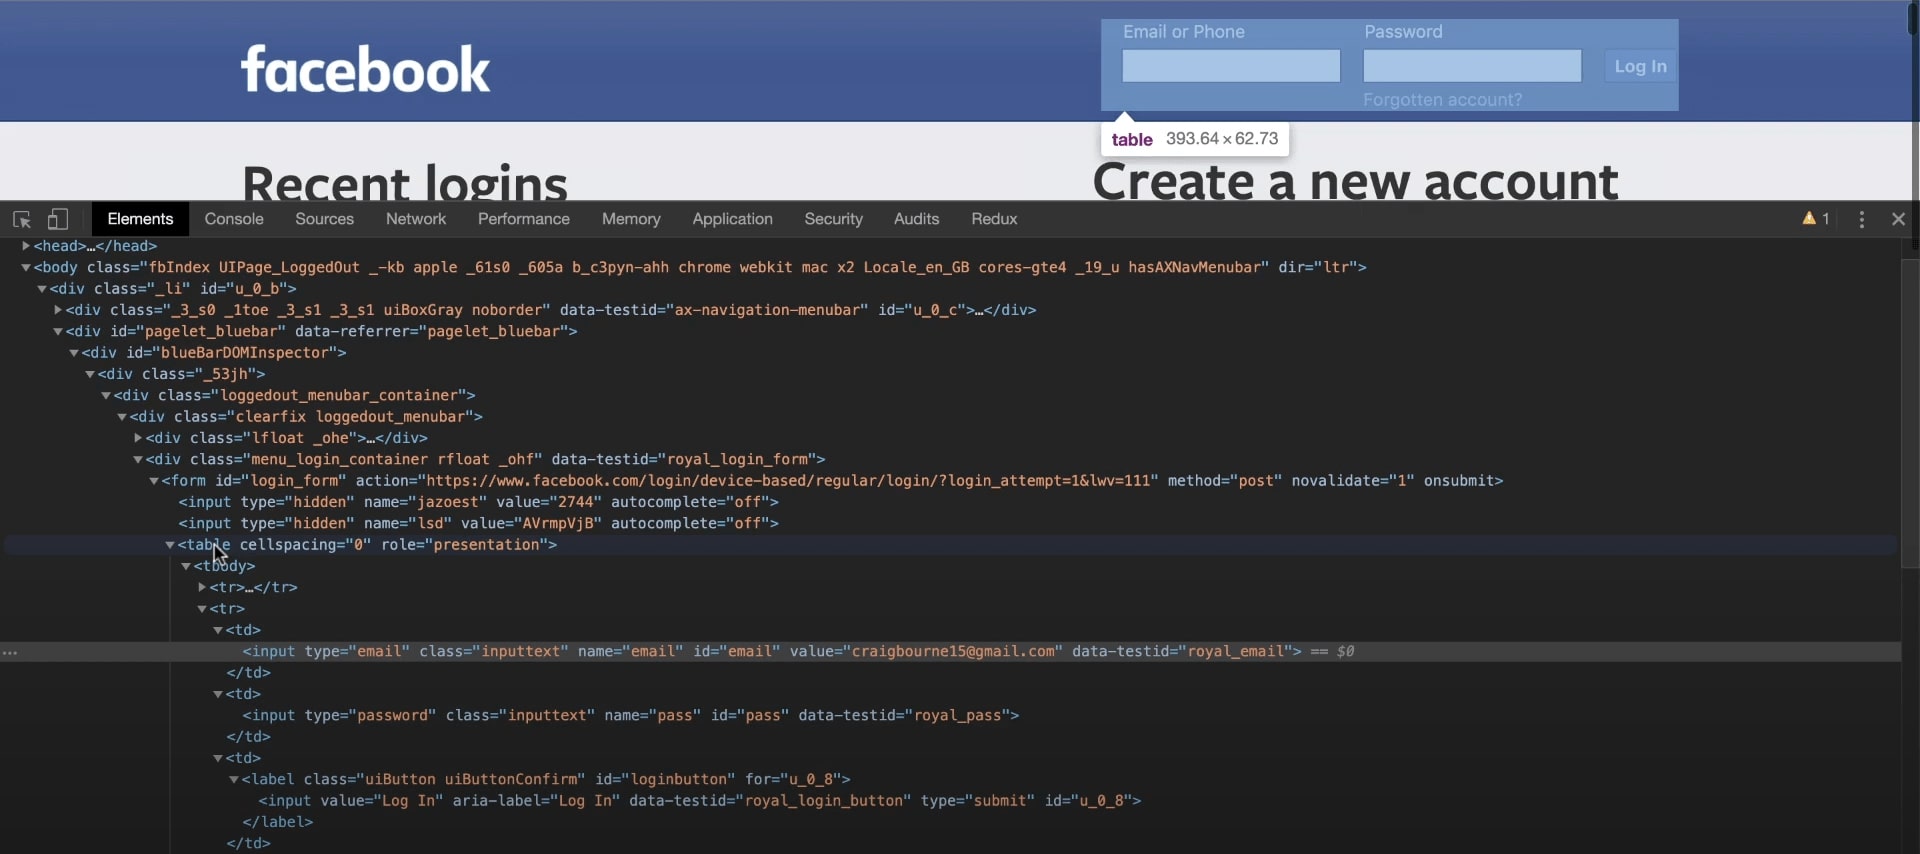
But interestingly you see that Facebook is using a table inside the form to help with layout, which is incredibly bad practice. There are so many better ways to achieve this simple layout using CSS. For example, we could use Flexbox or CSS Grid, both of which we cover in the CSS section.
I imagine this layout choice is a relic from earlier days of Facebook, that they haven't corrected. It is probably quite scary to touch, when they have a billion users online at any given moment.
This article explains why using tables for layout is bad practice. I encourage you to give it a read, and more importantly, to avoid doing it yourself.
Anyway, we have table rows for the text above the username and password fields and a table row for the form inputs. Then when we click ‘Log In' it submits the form.
We see it is an input that has a type attribute called submit. The other inputs have type attributes with different values, email and password respectively.
The opening <form> tag has an attribute called action="". This tells us where the form's data is being sent when you press that button to submit the form to Facebook. Here it is being posted to a page at a long URL somewhere deep within Facebook. When Facebook receive the form data, they will attempt to authenticate it against the details they hold for the user in their database. If it matches, you enter the site.
FORM ATTRIBUTES
So, as we've seen the form element uses a set of<form> </form> tags, and anything nested inside of these is part of that form.
<form> <!--Anything inside here is part of this form--> </form>Think of the form tags as a container of sorts for the various kinds of inputs that will be associated with the form, such as password and email inputs, submit buttons and so on.
Form tags typically come with two important attributes which are necessary because when you've filled out your form and you're happy with it, then you will submit it.
So as we said earlier, you will either POST data or you request or GET some.
<form action="" method=""></form>The Action Attribute
The first of these is the action attribute.
Every form has an action attribute which determines where form data will be sent. The value of the action attribute would usually be something like the URL for a page on a server that will receive information when it is submitted.
So again, the action attribute handles where to send the info entered into the form, once the form has been submitted.
The Method Attribute
The second attribute we will use is the method attribute which determines the HTTP method. So if action tells us where, then method is going to tell us how.
GET & POST
As we said, forms use one of two methods
We could either have:
- method="get"
- method="post"
GET means when we send the form, we are requesting data from a specified resource. For example, if you're searching for the latest Beyonce video on YouTube or new documentaries on Netflix, then you're asking the form to GET some data for you, package it up, and send it back.
The POST method is for sending data. For example, when you log in to Twitter or Instagram, you're posting your credentials to Twitter, who then check it against details in their database. If the details match, you're in. If not you will have to try again.
I just wanted to touch on this so you can form an idea of what's happening when we submit a form. Where it goes, and how.
We will go over all of this in much more detail later on, as we will be covering HTTP & authentication down the road. So there's no need for us to fret about this kind of stuff right now necessarily. Let's just take a mental note that forms usually have two attributes - the action and method.
WITHOUT A BACKEND, FORMS ARE PRESENTATIONAL
Ok, so now we know that form tags that wrap elements belonging to the form, and we know about the two attributes that we add to the opening form tag.
So we are now ready to start looking at form elements. Before we do, I'll just point out that the forms we make, purely with HTML will be functional (as in you will be able to interact with them by clicking submit buttons, entering text, and selecting options from dropdowns) but the data we enter into them is not going to go anywhere just at the moment as we don't have a backend.
When we submit forms and have them send or request data, that all happens on the backend with a programming language like Python, PHP or JavaScript with Node.js. We are using a markup language and data transfer is beyond the scope of HTML. So we can use HTML to display elements sure, we will learn CSS to style them after the HTML videos, but to process the form data, and have that data persist in storage, that is done by a programming language and it is much too early on for us to discuss that just at the moment.
So for now, we are just going to take a look at creating presentational forms and we will learn about how and why we use the different form elements.
THE INPUT ELEMENT
The most common form element that goes inside these form tags is the <input> element. This is an empty element, which means it is made up of one self-closing tag.
<input>Input type="text"
Input elements have an attribute which specifies the kind of input that it is going to be. This attribute is type="" and the attribute value differentiates one input type from another. We have some wildly different input elements available to us, and syntactically all that separates them from one another is the value of the type attribute. That's it!
The first kind we will take a look at is the input type="text":
<form action="" method=""><input type="text"></form>If you were to add an input tag without a type attribute specified, you would get this textbox as this is the default in all browsers. If we fail to specify the type of input we want, browsers like Chrome and Firefox will default to this basic text input. So using an input element without any type attribute added will always give you a type of text.
Still, it is good practice to ensure you explicitly define the input type, even when it is text. Another developer might look at your code and miss it at a glance. So do specify that it is type="text", even though we don't strictly need to.
Elements of type text create basic single-line text fields. You should use them anywhere you want the user to enter a single-line value and there isn't a more specific input type available for collecting that value.
PLACEHOLDER
One thing that we can do which is great for users is to add what we call placeholder text inside the input.
<form action="" method=""><input type="text" placeholder="username"></form>The placeholder is the greyed out text you often see on form inputs. Like we see in the example input above, and on Instagram where it says 'Phone number, username, or email' in the first input, and 'Password' in the second input.

A placeholder gives the user a short hint describing what to enter into the input field.
With placeholders, as soon as you start typing your first character, the placeholder text is cleared and only returns if and when the input field is empty. Try it in the example input field above.
EMAIL & PASSWORD INPUTS
Input type email
Type email is an input field which requires text to be entered in an email address format. Where the text input we have just seen requires a string of text, this input requires a single properly-formed email address.
This doesn't necessarily mean the e-mail address exists, but in simple terms, this meansusername@somedomain.com or .co.uk or .io or whatever extension.
Later on, once we have a submit button, I'll show you that if you try to submit a form without this format, it will give you a warning and the form will not submit.
Input type password
An input element with the type password defines a password field. You will notice any text that we enter here into a password field is concealed.
<form action="" method=""><input type="email" placeholder="email"><input type="password" placeholder="password"></form>Text, email, and password inputs cover three common textual inputs and we see how these all differ slightly just because of the value added to the type attribute.
LABELLING INPUTS
We can also add labels to our inputs. This is the text before the input boxes (though we can style it with CSS to change its location) like we see on the FB login form below. We add this text using the HTML label element, which provides this text before each input.

The label is not only visually associated with its corresponding input on the page, but it is also programmatically associated with it. And to make the association between a <label> and an<input> element, you need to give the <input> an id attribute. The <label> then needs a for attribute with a value matching the input's id.
Alternatively, there is another way to associate an input and a label. You can nest the<input> directly inside the <label>, in which case the for and id attributes are unnecessary as the nesting makes the association implicit.
Between the label's opening and closing tags, we can add some text like "Username:" or "Password:", or "Email:" which will display to the screen, making it clearer what each input field is for.
Like here at the Amazon sign-in page. If we inspect, we see the text above the inputs labels. Examining the label for the email, we see a forattribute saying this label is for something called ap_email. If we look underneath at the <input> element, we see that this input has an id also of ap_input.

<form action="" method=""><label for="email">Email:</label><input id="email" type="email">
<label for="password">Password:</label><input id="password" type="password"></form>
In the CodePen below, try clicking on the labels before each of the input. You will notice that the labels are programmatically associated with the inputs they are labelling. Clicking them will focus the input fields themselves ready for text to be entered.
We can also use label nesting, meaning we can use labels with any associated elements nested inside. So we could have our label element and then inside of that goes our input element. As we mentioned earlier, when we do this, we do not need the for attribute and we don't need to add the id to the input. The label and input are bound as is.
<form><label>Email:<input type="email"></label>
<label>Password:<input type="password"></label></form>
MAXLENGTH & MINLENGTH
We can add maxlength and minlength attributes to any textual input fields. We can also add these to the <textarea> element which we will look at shortly. These two attributes allow us to specify a maximum or a minimum number of characters a user can enter into an input field.
<input type="password" minlength="8" maxlength="12" >I don't know why, but there is a default maximum value set on input fields, and that is 524,288! If you had a decent typing speed of 75 words per minute, it would take you just under 5 days before it wouldn't accept any more characters. And yes, I am nerdy enough to have done that calculation.
In the CodePen below, we have an email input field and a password input. There is a minimum length of 8 and a maximum length of 15 on the password field. If we type something into the password input, say "abcdefghijkl", it will not allow us to type beyond the 12th character, which in this case is the letter 'm'. So this maxlength attribute prevents us from typing the next letter 'n', or any other character.
The minlength attribute means the user must type a minimum number of characters. So, in this case, the password must have a minimum length of 8. If you try to submit the form without meeting this condition, you will be greeted with a warning and the form will not submit.
TEXTAREA
Another textual element that isn't an input type, but is similar to those we have seen, is the <textarea> element. The textarea is used to create a multiline text input, like comment or feedback sections for example, where we might want to enter some longer text content into a form.
<textarea cols="40" rows="5"> </textarea>The textarea is interactive and we can click on the bottom-right corner to drag the text area around the page and resize the box. Try it out in the CodePen below. This might be preferable if we don't want to have to scroll up and down when we are typing.
You will notice that <textarea> elements have opening and closing tags, and any text that you place between those appear on screen inside the textarea itself.
Unfortunately, the user will have to delete this before they can enter text themselves, so it is not common to add anything between the opening and closing tags.
A much better option would be to make use of the placeholder attribute, which we saw earlier. Then the placeholder text will disappear as the user begins to type.
Textareas often come with an id attribute, and as we saw with input elements, this allows us to bind the textarea to a <label>.
The cols and rows attributes help us to set the initial display size of the textarea box by defining the number of columns and rows. We would be better off using CSS to define this of course, but as we are not currently using CSS, then these attributes help us with sizing.
FURTHER RESOURCES
- W3Schools: HTML Forms
- W3C: Forms in HTML
- MDN: Your first form
- MDN: How to structure a form
- MDN: The form element
- MDN: Web forms — Working with user data
- W3Schools: Form Input Types
- MDN: The Input (Form Input) element
- W3Schools: HTML Form Attributes
- W3Schools: The Input value attribute
- MDN: The Field Set Element
- Why You Should Avoid Tables for Web Page Layouts
- The checkbox hack
- CodePen: Pen for Forms (1): Text, Email, & Password Inputs
- CodePen: Pen for Forms (2): Clickable Inputs - Checkbox, Dropdown, Radio, & Submit
- CodePen: Pen for Forms (3): How to Build a form from start to finish (unstyled)
- CodePen: Pen for Forms (3): How to Build a form from start to finish (styled)