
HTML Syntax
An HTML element is a component of an HTML document and instructs the browser how to display content.
For example, the title element represents the document's title, a table element represents an HTML table, and a footer element represents a footer section of a web page.
To be able to create elements, we need to know about syntax. Or how we write HTML.
DOCUMENTS
Newspapers, brochures, and insurance forms are different kinds of documents that we use in everyday life. We commonly see some kind of structure to the content of these documents.
This structure comes from the use of hierarchical headings and subheadings, main paragraph text, lists, and tables.
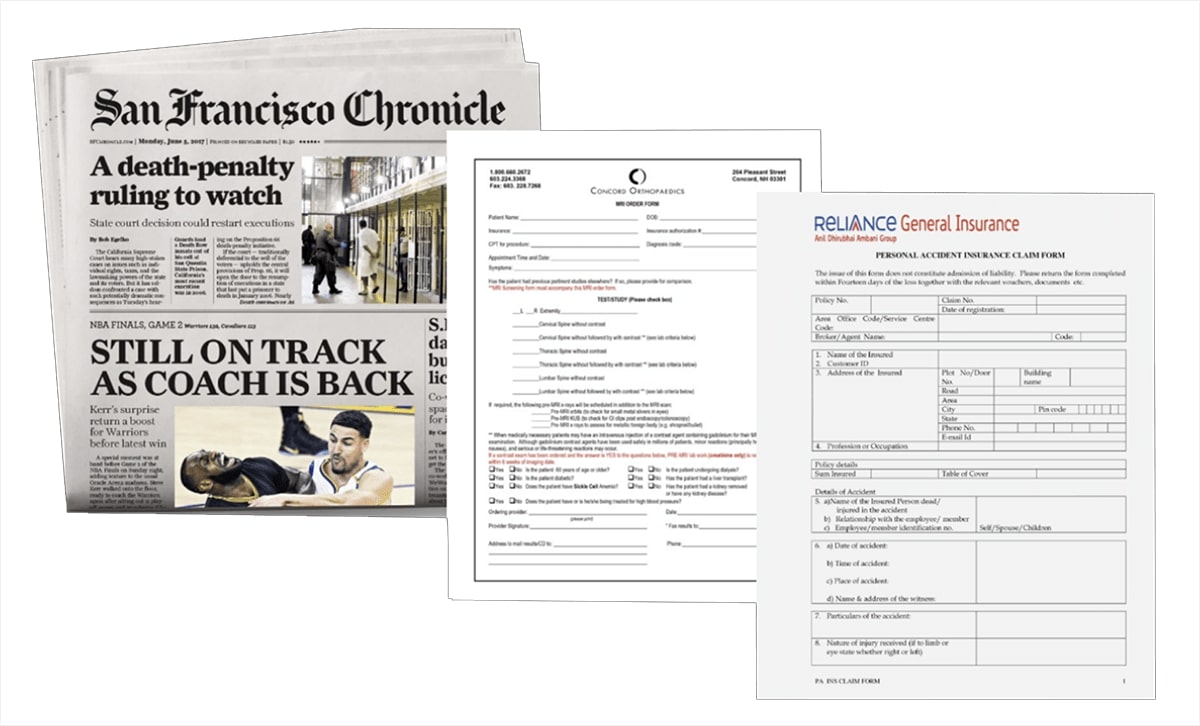
In the example document below, we have a main heading at the top, followed by some introductory text.
Each section has a subheading, which is expanded upon with short paragraphs.
The text is clearly separated and given structure.
STRUCTURING A DOCUMENT
So, if I take this same formatted text and add it to the embedded CodePen below, what do you think might happen?
Will it display in the browser already formatted like the example document above?
Try copying and pasting the text into the CodePen below to find out.
When you save, you will notice that we have the same content, but it is not formatted.
The text is squashed together, and the bold styles and font sizings from headings and sub-headings are absent.
The reason for this is that we have not communicated the structure of the HTML document to our browser. We have not made clear how we want our content to be displayed.
To format the text, we use HTML tags.
CASE INSENSITIVITY IN HTML
In HTML, tag and attribute names are not case-sensitive (but most attribute values are).
This means that <H1> and <h1> defines the same thing in HTML - which is the top-level heading element.
Even though the browser will recognize both, we should write our HTML elements in lowercase, as recommended by W3C - the main standards organization for the web.
FORMATTING TEXT WITH HTML TAGS
Go back to the text pasted into CodePen, and add some <h1></h1> tags to the text of Main Heading.
Remember that these tags go on either side of the text.
The opening tag has the element name enclosed in angled brackets, and the closing tag has that too, plus a forward slash (/) before the element name.
The heading text goes between these.
<h1>Main Heading</h1>Next, we will add an <h2> subheading. Again, we will ensure that we place opening and closing tags on either side of the text that reads Subheading.
<h2>Subheading</h2>Now we have our last two subheadings, which are slightly smaller. For these we will use <h3> tags.
<h3>Another subheading</h3>Lastly, we have seven paragraphs, and the text for each of these needs to be enclosed by <p> tags.
Again, we will need an opening tag preceding each section of paragraph text and a closing tag following each section of paragraph text.
<p>Lorem ipsum dolor sit amet, consectetur adipiscing elit. Nunc bibendum in tortor vitae pharetra. </p>So there you have it. We have taken a simple document and reproduced its structure with HTML. Once you have marked up the text correctly, it should look something like this:
THE GENERAL RULE OF HTML SYNTAX
Two things that I do want you to take away is that first, we use HTML to structure our content, and second, there is something that is a little bit of a pattern or general rule of HTML.
Below I am going to summarise what we have learned above:
- An HTML element usually consists of an opening tag and a closing tag, with the content inserted in between those.
- The opening tag gives the browser an instruction, and the closing tag informs the browser that that instruction has ended.
- Each tag is made up of angled brackets with the name of the element inside.
NOTE: The closing tag is almost the same as the opening tag but has one key difference. That is that we put a forward slash in the closing tag before the name of the element.
So we can say that a general rule of HTML is this:
An HTML element has an opening tag and a closing tag that surround content.
Tags then, in a way, act as containers and tell us something about the information that lies between them.
If we have <h1></h1> opening and closing tags with content in between, we can safely assume that the content is the main heading of the page.
SELF-CLOSING TAGS
This next part is confusing. In addition to elements that follow the general rule of HTML that we have just defined, some elements are made of a single tag.
Usually, these would be elements that have no inner text content to be wrapped.
We call these empty elements, and these are made of self-closing tags.
Images
An example of an empty element would be the <img> image element.
<img src="https://images.unsplash.com/photo" alt="Sourced from Unsplash">*The blue text is the attribute name, and the pink text is the attribute value.

We see that in the example code above that the image element contains other details that we have not yet seen.
These are HTML attributes, which give us extra information about elements.
In this case, src refers to the source location of the image.
The alt attribute provides alternative text, which is used if the image cannot be viewed.
There are also a few empty elements that can help us to visually divide up web pages. For example, The <br> tag inserts a line break, and the <hr> tag creates a horizontal rule or line.
Since both of these are empty elements, there is no need for either to have a corresponding closing </br> or </hr> tag.
We do not need to worry about self-closing tags too much right now.
I just wanted to show you that these do exist, so that you know that some HTML elements are written in an alternative syntax.
To summarise, empty elements are usually those which do not wrap text content. We will cover them in greater detail later on in this HTML section.
The HTML elements that we will learn initially are going to follow the general rule that we have established. That we will have some content surrounded by two tags. An opening tag and a closing tag.
DEFINING PREFORMATTED TEXT
Sometimes, it may not be convenient to manage space with the use of elements like <br>.
Alternatively, we can use the <pre> preformatted text element to present text as it is written in the HTML file. White space is recognized and displayed in the browser.
The text of a <pre> element is in a monospace font by default (we will learn how to change this in the CSS section).
Whitespace inside this element is displayed as it is written.
<pre> can be a useful element when presenting text where spaces and line breaks are necessary. A poem or song lyrics, for example.
In this section, we have learned how to write HTML. In other words, what the syntax of HTML is.
We learned of a general rule in HTML - that most HTML elements have an opening tag and a closing tag that surround some content.
So, with this knowledge in the bank, we can now begin building our first simple web page.
In the very next section, we will do just that. We will begin to look at the structure of HTML documents and add to our repertoire of HTML elements.
WRITING COMMENTS IN HTML
Comments can make code easier to understand. They may guide other developers (and you in the future) to understand what the purpose of a given section of code is.
We can use comments to leave ourselves annotations, reminders, and explanations. Or we can add comments to mark sections of applications, so they are easily visible in code editors.
Well-written code should not need to be commented very much at all.
Any comments that you do add are hidden from the user in the browser.
A comment in HTML begins with <!--, and ends with -->:
<!-- This comment will not be displayed -->In other languages, the syntax for writing comments differs.
But code editors and online sandbox environments usually provide keyboard shortcuts for commenting. In all code editors I have used, we can comment anything out by highlighting it and hitting command + /, or ctrl + /.